Date Scones with Dark Chocolate and Orange
Date scones have been part of my winter baking for a few years now, often making their first appearance around Christmas. Dates are one of my favourite dried fruits to eat on their own, and they’re a classic ingredient in Maritime kitchens thanks to date squares, which almost always show up at weddings, funerals, and family gatherings.

The combination of sweet, sticky dates, rich dark chocolate, and bright orange zest is what brings me back each year. I use a microplane for the orange zest because it grates it superfine, and I like using a bench scraper to shape the dough into a neat circle before slicing. Something I also do is chill the flour after cutting in the butter, but you can use frozen or very cold butter instead and skip the chilling step. It’s a simple mix of flavours that feels festive through the colder months.
Jump to:
Ingredients For Date Scones

Ingredient Notes
- 35% Cream: Also called whipping cream, or sometimes heavy cream, this enriches the dough and helps with browning.
- Baking Powder: For the best rise, make sure it’s not expired.
- Butter: I use salted butter for all of my recipes.
- Dark Chocolate: Use a good-quality bar and chop it yourself for uneven chunks that speckle the scones.
- Dates: I buy whole Medjool dates and remove the pits myself.
- Egg: I use large eggs for all of my recipes.
- Orange Zest: A microplane is awesome for superfine-grated zest, but you can also use the smallest holes on a box grater.
- Salt: I use table salt for all of my recipes.
- Sugar (Coarse): Adds a crisp, sparkly topping when sprinkled over the scones before baking. Using it is optional. I buy it at the Bulk Barn (not sponsored).
It’s important to note that when making substitutions in recipes, the texture and flavour may be slightly different. However, these substitutes are the best options for changing the original recipe.
Ingredient Substitutions
- 35% Cream: Replace with the same amount of half-and-half (sometimes called blend), whole milk, or buttermilk.
- All-Purpose Flour: You can use the same amount of pastry flour.
- Baking Powder: Use ¼ teaspoon of baking soda plus ½ teaspoon of cream of tartar in place of 1 teaspoon of baking powder.
- Butter: You can replace it with the same amount of unsalted butter or margarine.
- Dark Chocolate: Substitute with any chopped chocolate or chocolate chips you like.
- Orange Zest: If you don’t have this, I would omit. Lemon zest might be ok, but it doesn’t work in my mind.
- Sugar (Coarse): Use the same amount of granulated sugar sprinkled on top.
Recipe Variations
Try any of the following for a twist on this date scones recipe:
- Candied Ginger: ¼ cup, finely chopped, fold into dough before shaping
- Cardamom: 1 teaspoon, ground, whisk into flour mixture
- Cinnamon: 1 teaspoon, ground, whisk into flour mixture
- Coffee: 1 tablespoon, instant granules, dissolve in cream before adding to dough
- Nuts: ½ cup, almonds, hazelnuts, pecans, or walnuts, toasted (optional) and chopped, folded in with the dates and chocolate
- Rosemary: 1 teaspoon, fresh, finely minced, whisk into flour mixture
Use the JUMP TO RECIPE button at the top of this post, or scroll to the bottom to see the PRINTABLE recipe card with ingredient measurements and complete instructions.
How To Make Date Scones
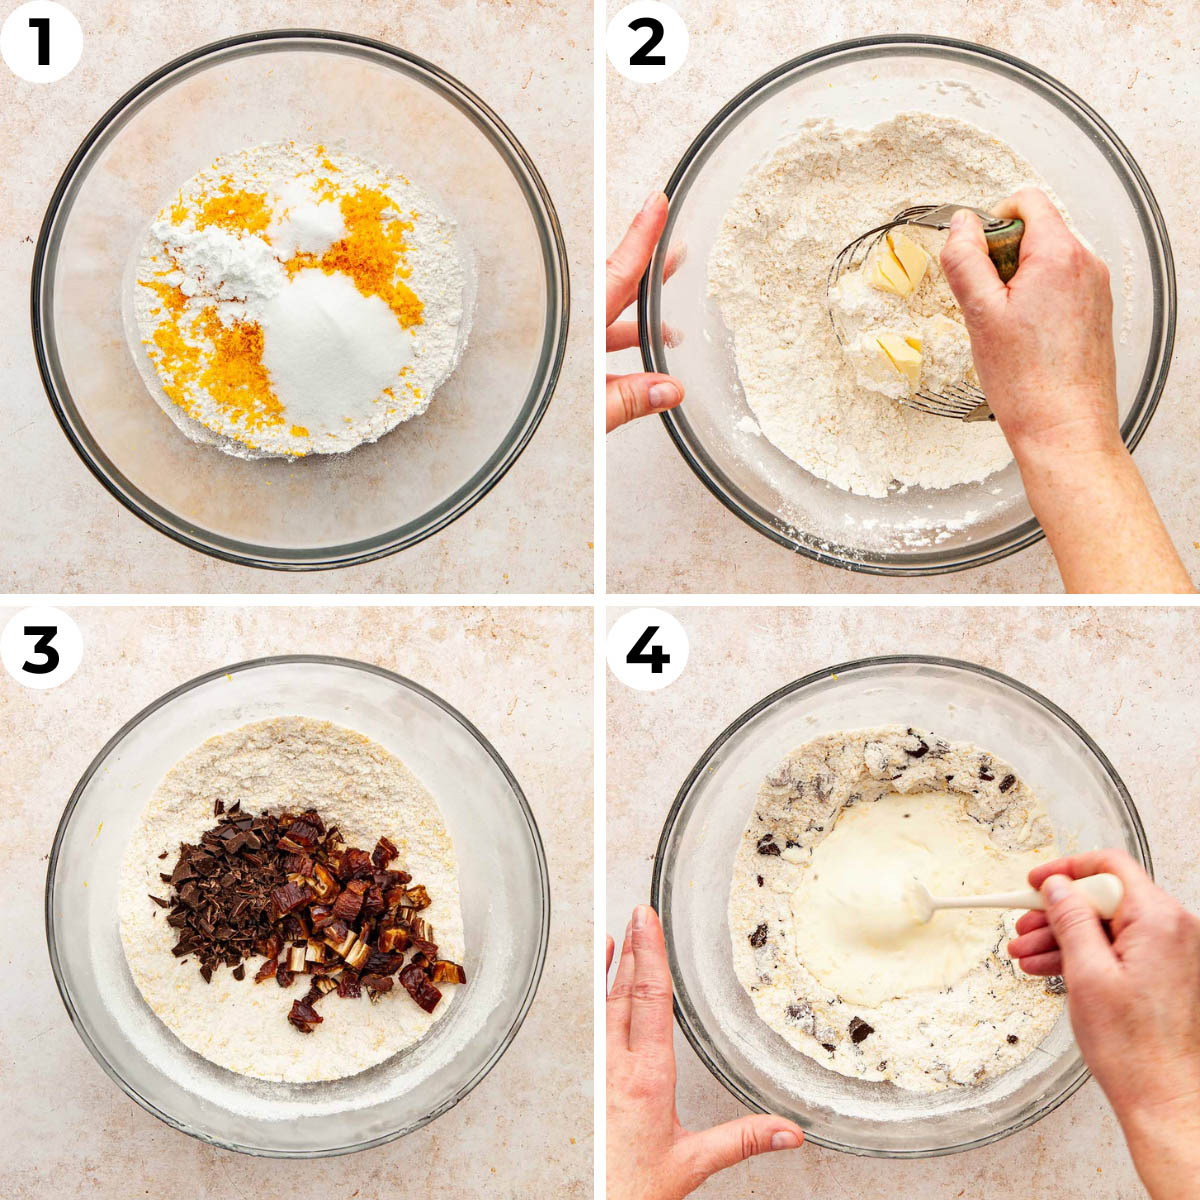
STEP 1: Place the flour, sugar, baking powder, salt, and orange zest in a large bowl and whisk to combine.
STEP 2: Cut in the butter with a pastry blender or fork until the mixture is coarse and sandy.
STEP 3: Stir in the chopped dates and chocolate, then place the bowl in the freezer for 30 minutes.
STEP 4: Make a well in the centre, add the whipping cream and egg, and whisk them together with a fork.
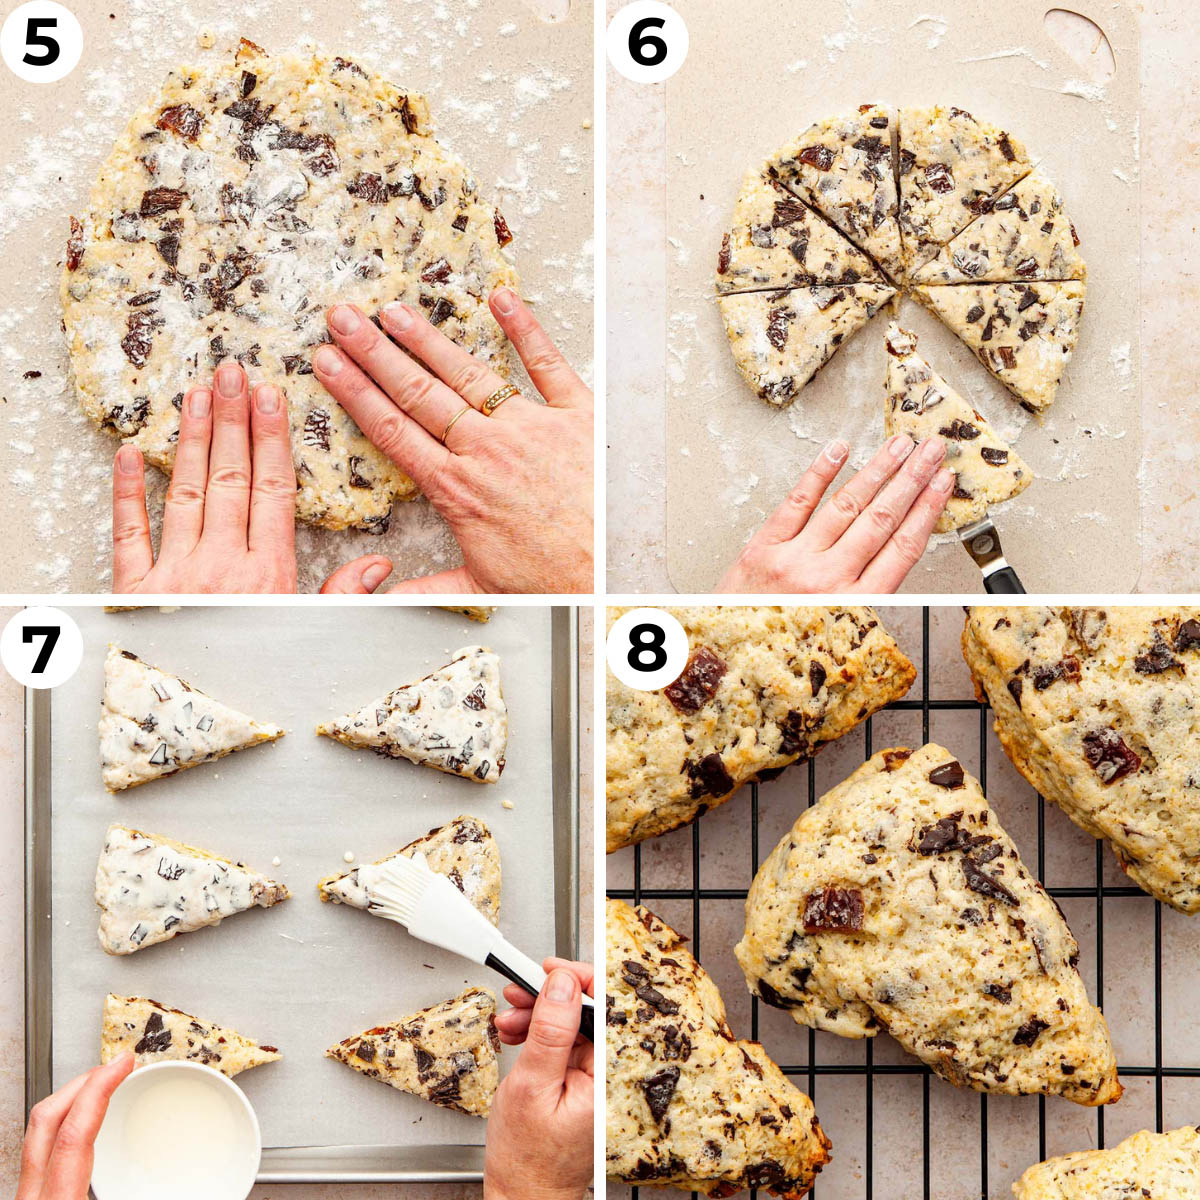
STEP 5: Lightly flour a work surface, then turn out the dough. Sprinkle the top with flour and use your hands to quickly shape it into a circle.
STEP 6: Use a sharp knife to slice the dough into eight wedges, and transfer them to a prepared baking sheet.
STEP 7: Brush the tops with cream and sprinkle with coarse sugar if using.
STEP 8: Bake until the bottoms and edges are golden, then cool on a wire rack for 10 minutes before serving.
Expert Tips
- Grate the orange zest right over the bowl of flour so you catch all the fragrant oils.
- You don’t have to freeze the flour mixture. You can use frozen or very cold butter instead and proceed with the recipe, skipping the chilling time.
- A bench scraper makes it easy to tidy the edges of the dough circle and lift wedges onto the pan without squishing them.
Recipe Notes
- For detailed ingredient notes, substitution tips, variations, and step-by-step photos, scroll through the full recipe post.
- Use a digital kitchen scale for precise measurements and an oven thermometer to confirm your oven is heating correctly.
- Slice the dough with a long, sharp knife in one clean motion instead of sawing back and forth.
- Let the scones cool just long enough to set before moving them to a rack so they do not break apart.
Storage
- Keep the cooled scones in an airtight container at room temperature for up to 2 days. Freeze for up to 2 months and thaw at room temperature, or warm them in the oven for a few minutes before serving.
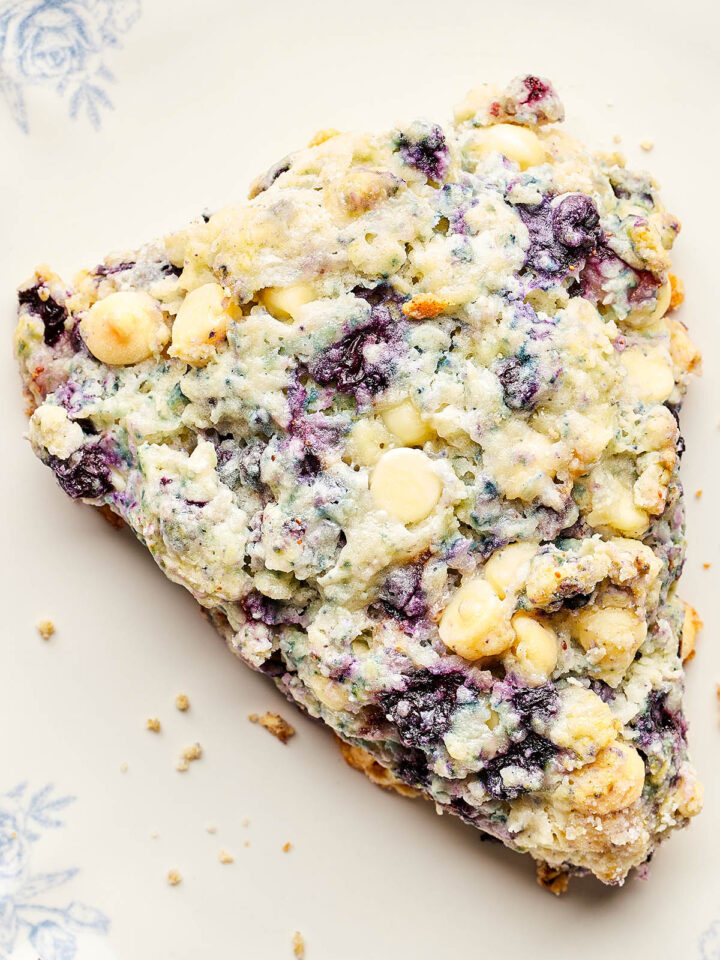
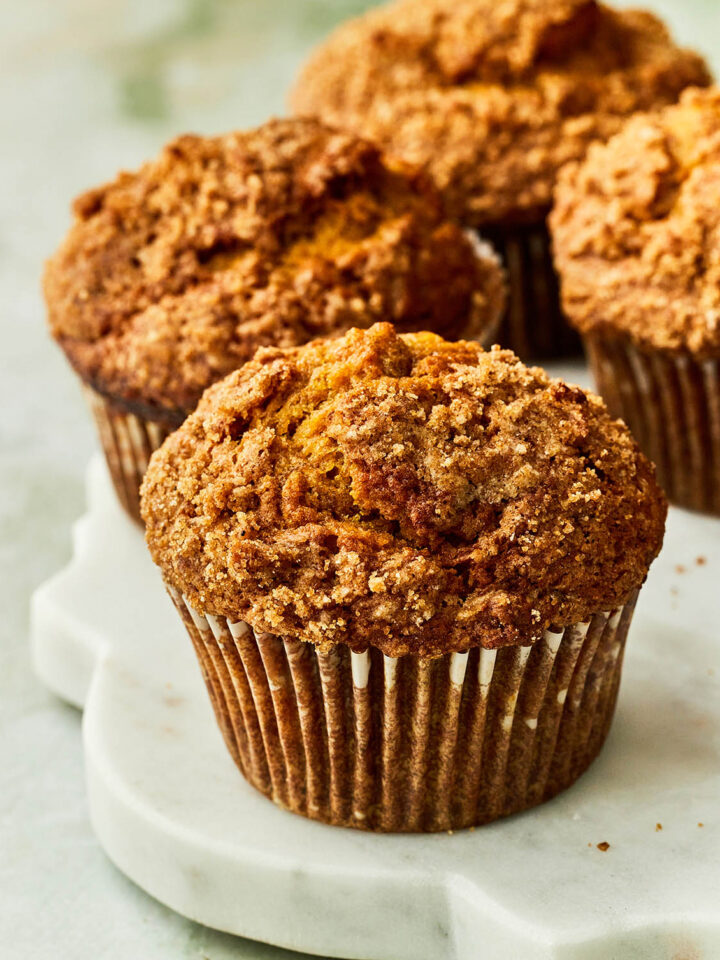
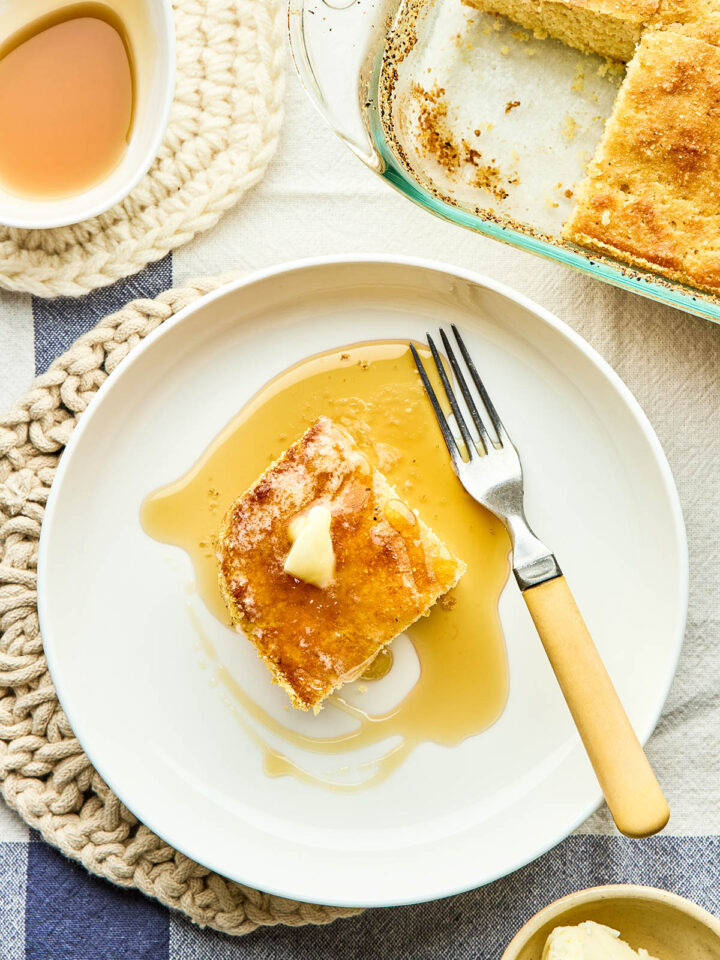
Recipes Related To Date Scones
Printable Recipe Card

Date Scones with Dark Chocolate and Orange
Equipment
- Measuring cups and spoons or digital kitchen scale
- Microplane of fine grater
- Large bowl
- Pastry blender or fork
- Baking sheet
- Parchment paper
- Rubber spatula or sturdy spoon
- Sharp knife
- Pastry brush
- Wire cooling rack
Ingredients US cups or click for Metric grams
- 2 cups all-purpose flour (plus extra for shaping)
- ½ cup granulated sugar
- 1 tablespoon baking powder
- 1 teaspoon table salt
- 1 medium orange (zest only, finely grated)
- ⅓ cup salted butter (room temperature)
- 1 cup Medjool dates (about 10 to 12 dates, pitted and chopped)
- ¼ cup dark chocolate (rough chopped)
- ¾ cup 35% cream (plus extra for brushing)
- 1 large egg
- 1 tablespoon coarse sugar (optional, for garnish)
Instructions
- Place the flour, sugar, baking powder, salt, and orange zest in a large bowl and whisk to combine.
- Cut in the butter with a pastry blender or fork until the mixture is coarse and sandy. Use your fingertips to smoosh any larger pieces of butter. Stir in the chopped dates and chocolate, then place the bowl in the freezer for 30 minutes.
- Preheat the oven to 350ºF (180ºC) and line a baking sheet with parchment paper.
- Remove the bowl from the freezer. Make a well in the centre, add the whipping cream and egg, and whisk them together with a fork. Switch to a wooden spoon or spatula and fold until the flour is just mixed in.
- Lightly flour a work surface, then turn out the dough. Sprinkle the top with flour and quickly shape it into an 8-inch (20 cm) circle about ¾-inch (2 cm) thick.
- Using a sharp knife, slice the dough into eight wedges, flouring the blade if needed. Transfer the wedges to the prepared baking sheet.
- Brush the tops with cream and sprinkle with coarse sugar if using. Bake for 22 to 24 minutes, or until the bottoms and edges are golden. Cool on a wire rack for 10 minutes before serving.
Notes
- For detailed ingredient notes, substitution tips, variations, and step-by-step photos, scroll through the full recipe post.
- Use a digital kitchen scale for precise measurements and an oven thermometer to confirm your oven is heating correctly.
- Slice the dough with a long, sharp knife in one clean motion instead of sawing back and forth.
- Let the scones cool just long enough to set before moving them to a rack so they do not break apart.
Storage
- Keep the cooled scones in an airtight container at room temperature for up to 2 days. Freeze for up to 2 months and thaw at room temperature, or warm them in the oven for a few minutes before serving.
Nutrition
Nutrition information is an estimate and is provided as a courtesy. For precise nutritional data, please calculate it independently using your preferred nutrition calculator.


More Bread & Loaf Recipes


Kelly Neil is a recipe developer, food photographer, and lifelong Nova Scotian building a sense of home and identity through recipes. She lives in her hometown of Dartmouth with her partner, Chris, their daughter, Elodie, and their little dog, Skipper.
This post may contain affiliate links. As an Amazon Associate, I may earn a small commission if you buy something through one of them at no extra cost to you. I only share products I use myself and genuinely recommend.