Small-Batch Cinnamon Rolls
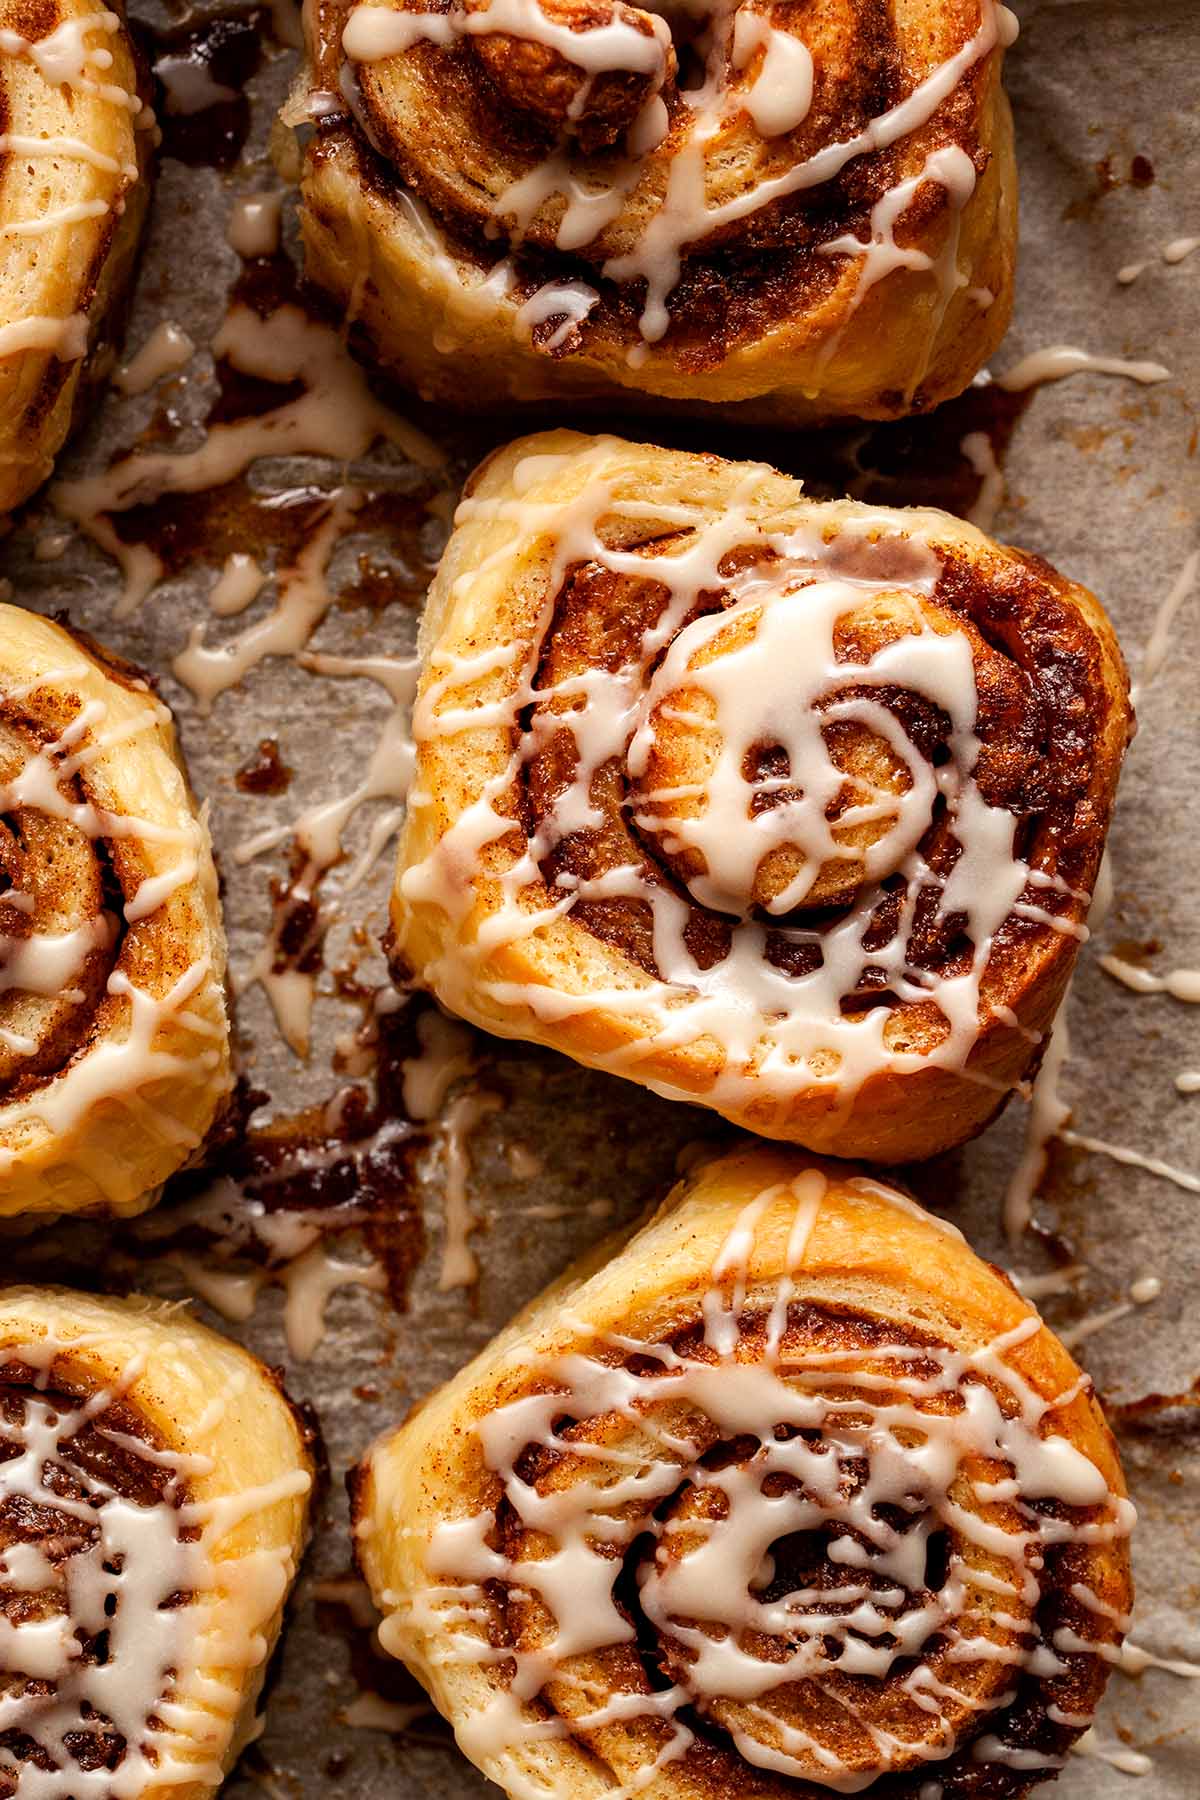
The hardest part of making these small-batch cinnamon rolls is waiting for the dough to rise. I use buttermilk in this recipe because I love the flavor and always have it on hand. If you don’t have buttermilk, use whole milk instead.
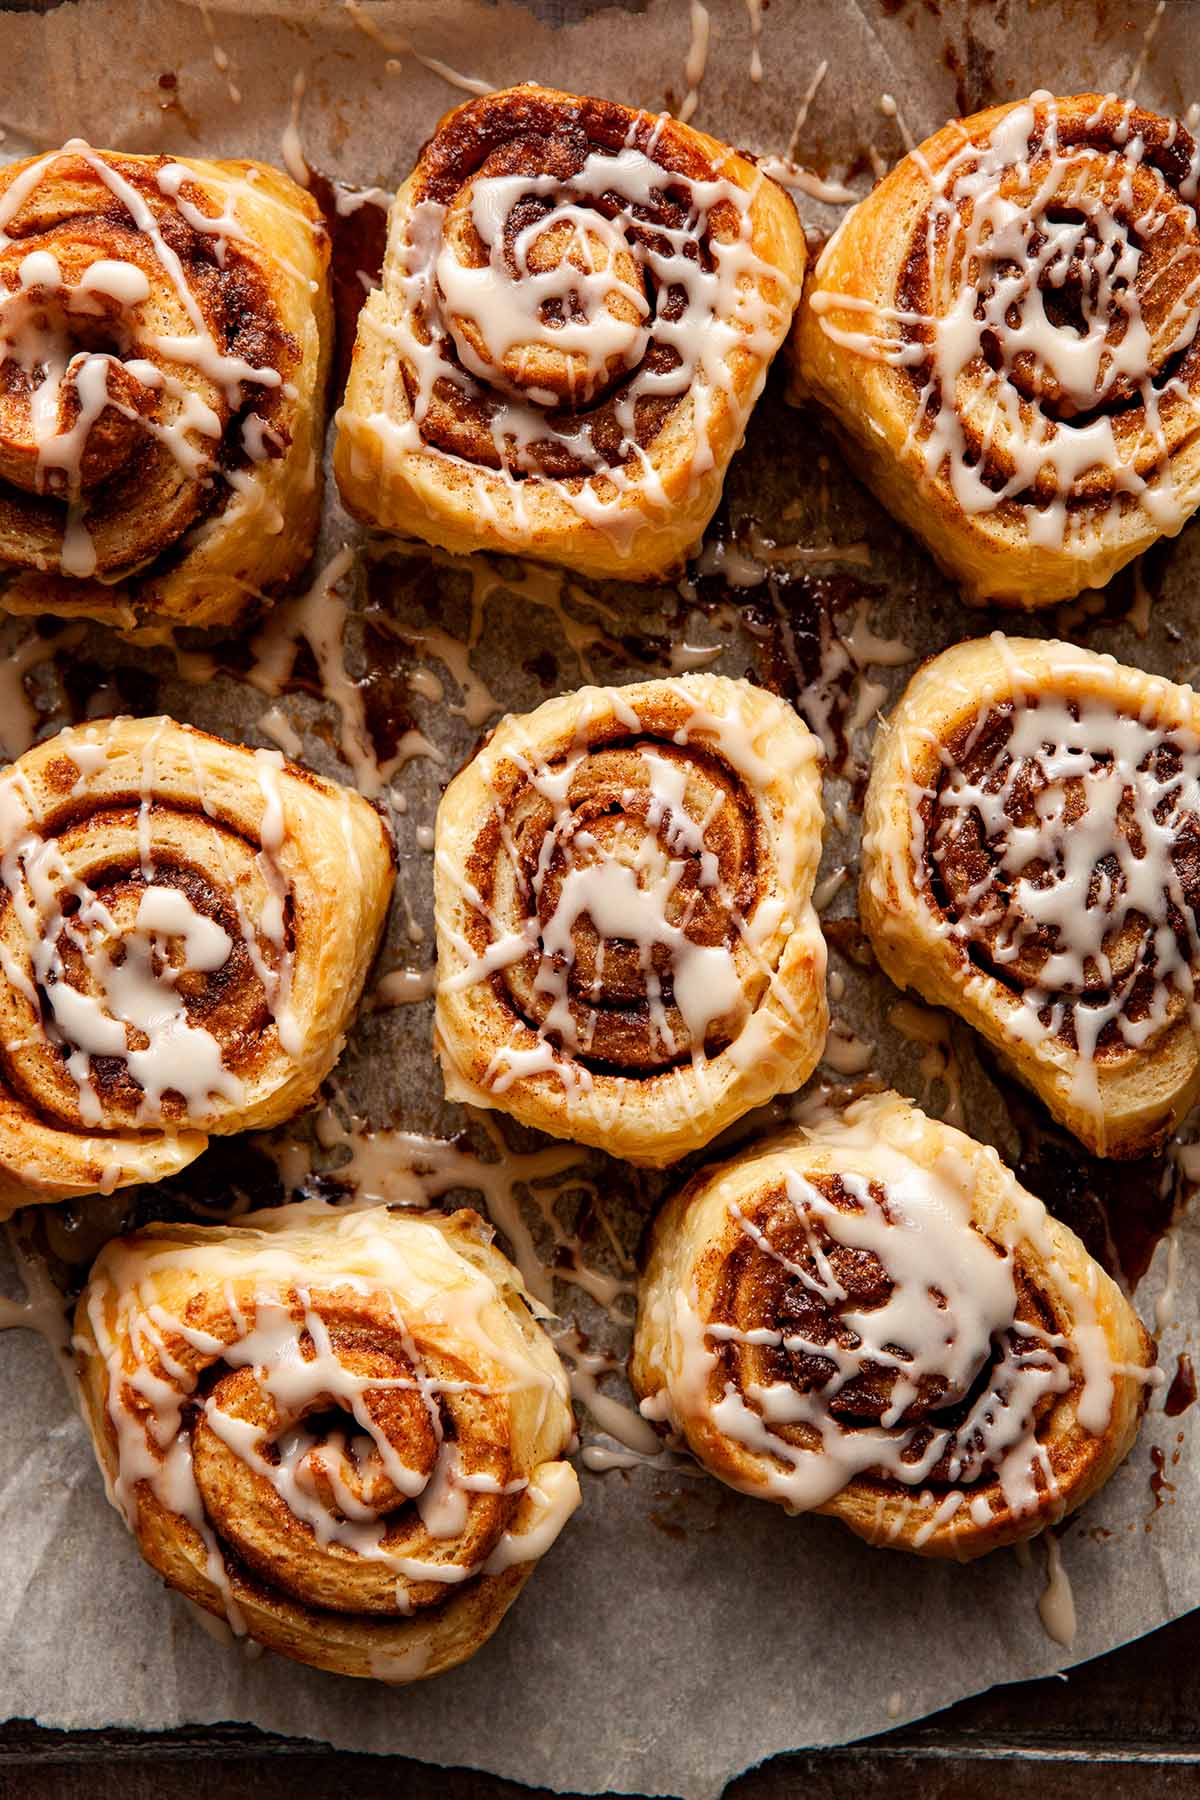
The filling is dark, sweet, and deeply spiced with cinnamon. When assembling the rolls, you might think there’s too much filling, but trust me, it’s the perfect amount! The finishing touch is a simple powdered sugar glaze. If you have time, make this whipped cream cheese frosting instead. Slather it on when the rolls are still slightly warm. Heavenly!
Jump to:
Why You’ll Love This Recipe
✔️ You can make the rolls ahead of time.
✔️ They taste like homemade Cinnabon buns.
✔️ Who doesn’t love cinnamon rolls?
Ingredients For Small-Batch Cinnamon Rolls
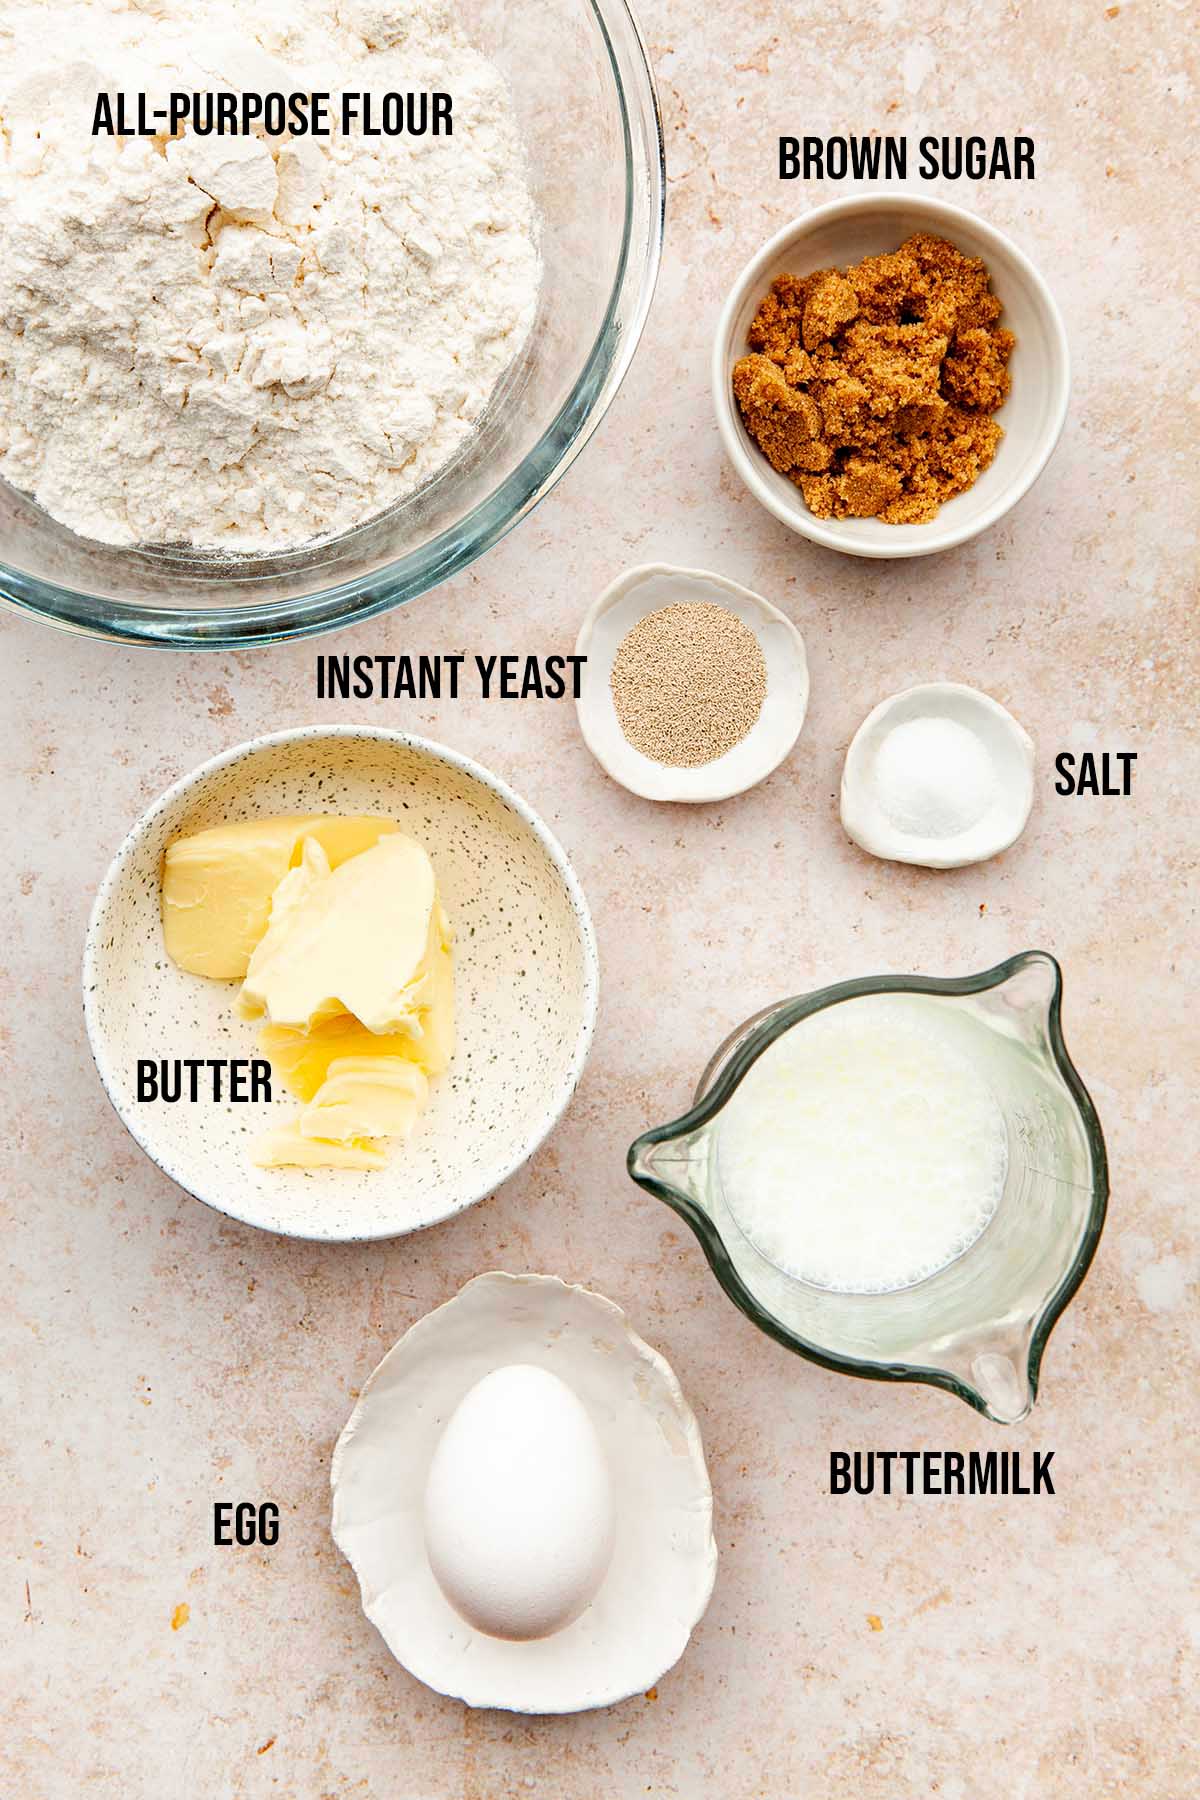
Ingredient Notes
- Instant Yeast: Also called rapid-rise or fast-acting yeast. Be sure to use freshly or recently opened yeast.
- Buttermilk: This adds extra richness to baked goods.
- Ground Cinnamon (not pictured): Use fresh or recently opened cinnamon for the best flavor.
It’s important to note that when making substitutions in recipes, the texture and flavor may be slightly different. However, these substitutes are the best options for changing the original recipe.
Ingredient Substitutions
- Butter & Milk: I haven’t tested a non-dairy version, however, I think this recipe should be fine with non-dairy or plant-based butter and milk.
- Buttermilk: Buttermilk is a great substitute for milk.
Use the JUMP TO RECIPE button at the top of this post, or scroll to the bottom of the post, to see the PRINTABLE recipe card with ingredient measurements and complete instructions.
How To Make Small-Batch Cinnamon Rolls
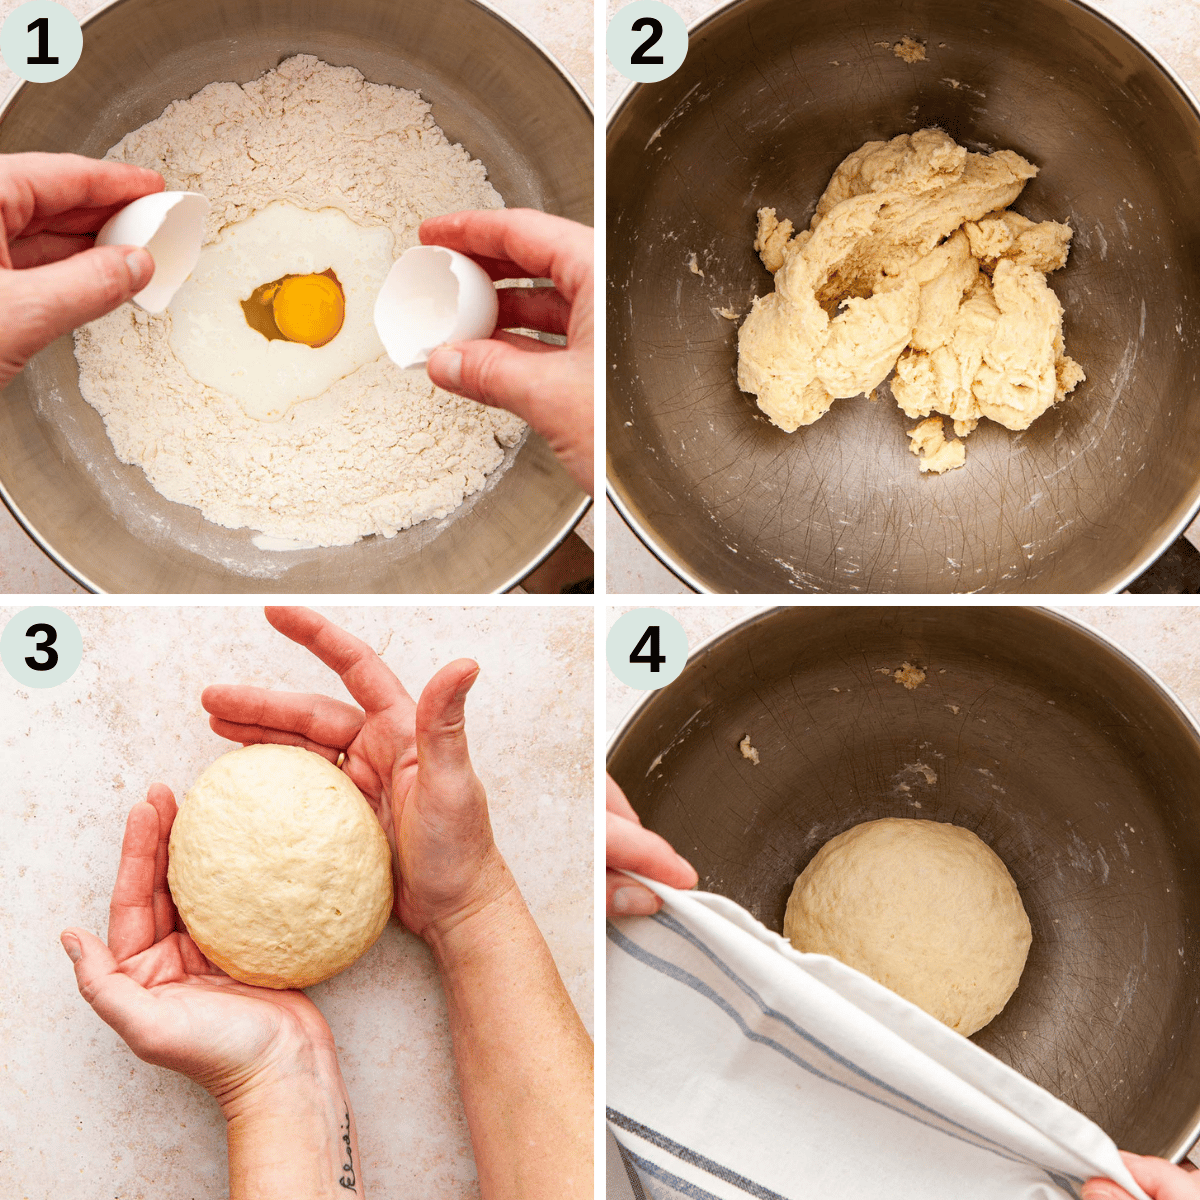
STEP 1: Mix the flour, brown sugar, yeast, and salt in the bowl of a stand mixer. Add the butter and continue to mix until the butter is coarse and crumbly. Add the buttermilk and egg.
STEP 2: Use the paddle attachment on low speed until the ingredients combine to form a soft dough that clears the sides of the mixing bowl.
STEP 3: Shape the dough into a ball. Pinch the bottom seam of the bowl together to seal.
STEP 4: Return the dough ball to the mixing bowl and cover it with a tea towel. Place the bowl in a warm, draft-free spot to rise for two hours.
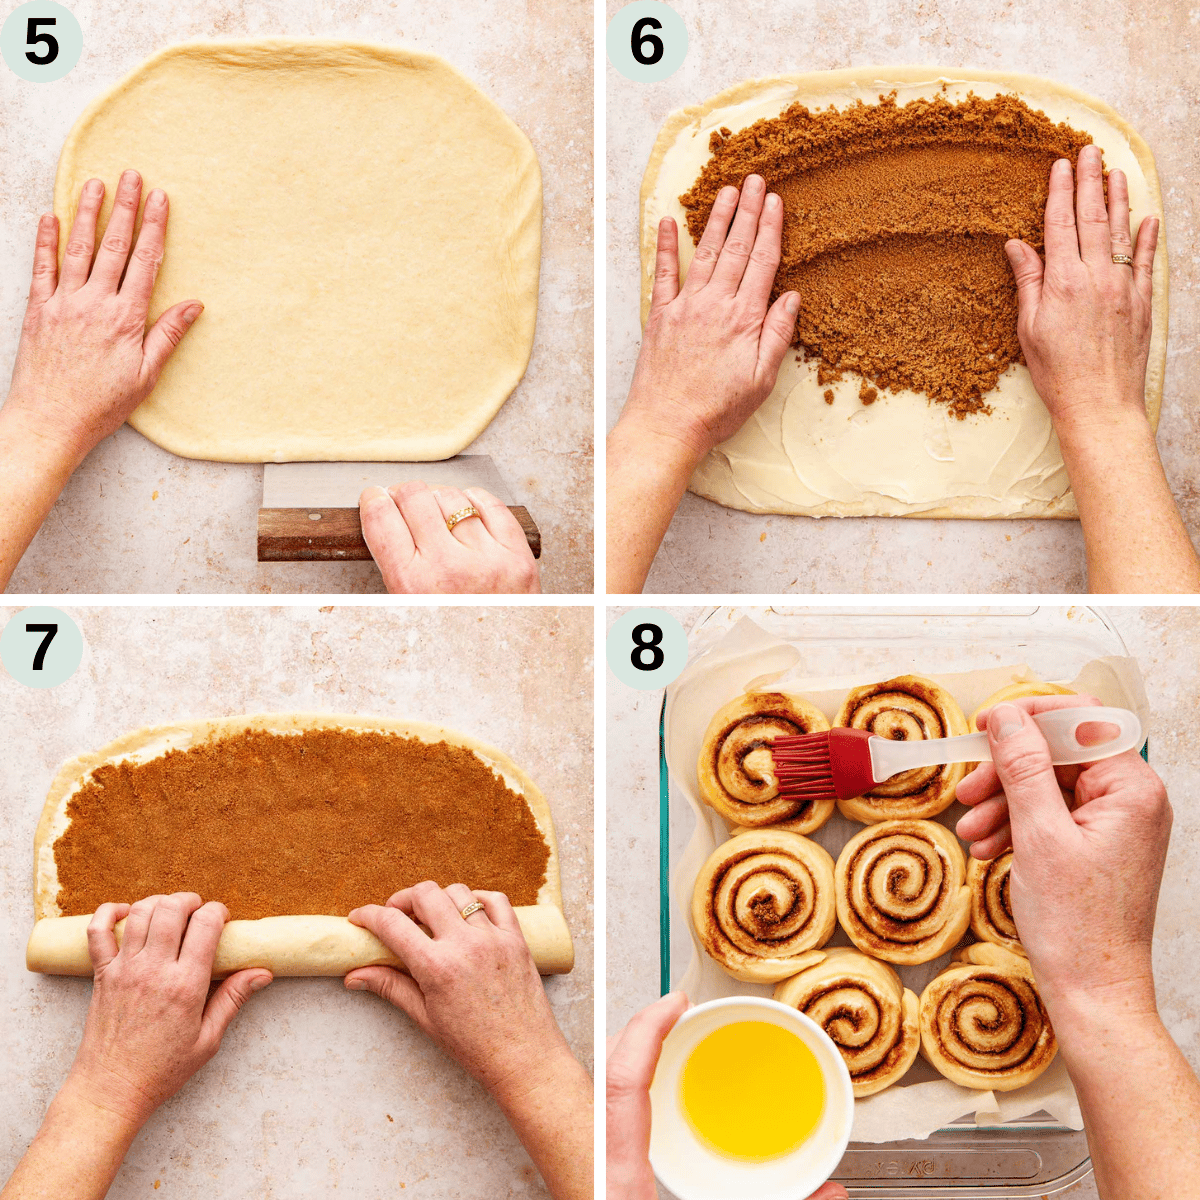
STEP 5: Roll the dough into a rectangle approximately 11×13-inches (28×33-cm) in size.
STEP 6: Spread the butter evenly over the dough. Top with brown sugar and cinnamon. Use your hands to spread the brown sugar mixture over the dough and press it gently into the butter.
STEP 7: Roll the dough into a log. The log should be tight enough to keep the filling inside, but if it’s too tight, the rolls will not bake through the middle.
STEP 8: Slice the log into eight cinnamon rolls, then place them in a parchment-lined dish to rise for two hours. Brush the rolls with melted butter and bake.
Expert Tips
1. A bench scraper (process shot 5) is great for straightening the edges of the dough.
2. For extra richness, drizzle ½ cup of 35% cream over the rolls before baking.
3. These cinnamon rolls are best the day they’re baked.
Recipe Notes
- If you don’t own a stand mixer, make your small-batch cinnamon rolls by hand with a fork.
- A serrated knife is best to cut the rolls. Saw gently back and forth rather than pressing down.
- The rolls will leak butter while baking. Don’t be alarmed! It will settle down and merge with the brown sugar into a sticky bottom layer.
Storage
- Once cool, store the rolls in a large zipper-top bag or container with a lid. They can stay on the counter for a day or two. You can also place them in a large freezer bag and store them in the freezer for up to one month. Thaw at room temperature or gently reheat in the microwave.
More Cinnamon Recipes
Did you make these small-batch cinnamon rolls? Please rate the recipe and let me know how it went in the comments below. Stay in touch with me on Instagram, Facebook, and Pinterest to see more easy comfort food recipes!
Printable Recipe Card

Small Batch Cinnamon Rolls
Equipment
- Stand mixer with paddle attachment and dough hook
- Measuring cups and spoons or digital kitchen scale
- Rolling Pin
- 8 or 9-inch (20 or 23-cm) square or round baking dish
- Parchment paper
- Plastic wrap
Ingredients US cups or click for Metric grams
For The Enriched Dough
- 2 cups all-purpose flour
- 2 tablespoons brown sugar
- 1 teaspoon instant yeast (also called rapid rise)
- ½ teaspoon salt
- ¼ cup butter
- ½ cup buttermilk
- 1 large egg
For The Cinnamon Filling
- ¼ cup butter (softened, plus 1 tablespoon of melted butter for brushing the rolls)
- ⅔ cup brown sugar
- 1 tablespoon ground cinnamon
For The Glaze
- ½ cup powdered sugar (sifted)
- ½ teaspoon vanilla
- ½ teaspoon buttermilk (or more to reach your desired consistency)
Instructions
Make The Dough
- Using a stand mixer, mix the flour, brown sugar, yeast, and salt together on low. Add the butter and continue to mix until the butter is coarse and crumbly.
- Stop the mixer. Make a well in the flour with your hands and add the buttermilk and egg. Mix on low until a soft dough forms that clears the bowl, then switch to the dough hook. Knead on low speed for 5 to 6 minutes.
- Remove the dough from the bowl. Knead it 25 to 30 times by hand, then shape it into a ball. Place it back in the mixing bowl seam side down. Cover the bowl and let it rise in a warm, draft-free place until doubled in volume, about 2 hours.
Assemble The Cinnamon Rolls
- Once risen, gently deflate the dough, and transfer it to a lightly floured work surface. Use a rolling pin, roll the dough into a rectangle, approximately 11×13-inches (28×33-cm) in size, and about ¼-inch (½-cm) thick.
- Spread the butter evenly over the dough. Use your hands to gently spread and press the brown sugar and cinnamon into the butter.
- Beginning on a long side, roll the dough into a log. Once rolled, pinch the outside seam of dough together to keep it from unrolling.
- Line the baking dish with parchment paper. Use a serrated knife to gently saw the log into 8 cinnamon rolls. Arrange the rolls in the prepared dish. Cover the dish tightly with plastic wrap and let the rolls rise for 2 hours.
Bake The Cinnamon Rolls
- Preheat the oven to 350ºF (180ºC). Brush the top of each roll with melted butter, then bake for 26 to 28 minutes or until golden and the cinnamon filling is bubbling. Cool the cinnamon rolls on a wire rack before mixing together the powdered sugar, vanilla, and buttermilk. Spread or drizzle the glaze over the rolls before serving.
Notes
- If you don’t own a stand mixer, make small-batch cinnamon rolls by hand using a fork to mix the dough.
- A serrated knife is best to cut the rolls. Saw gently back and forth rather than pressing down.
- The rolls will leak butter while baking. Don’t be alarmed! It will settle down after a few minutes of cooling and merge with the brown sugar into a sticky bottom layer.
- To Store — Once cool, store the rolls in a large zipper-top bag or container with a lid. They can stay on the counter for a day or two.
- To Freeze — Place cooled rolls in a large zipper-top freezer bag and keep in the freezer for up to one month.
Nutrition
Nutrition information is an estimate and is provided as a courtesy. For precise nutritional data, please calculate it independently using your preferred nutrition calculator.

More Bread & Loaf Recipes

Kelly Neil is a recipe developer, food photographer, and lifelong Nova Scotian building a sense of home and identity through recipes. She lives in her hometown of Dartmouth with her partner, Chris, their daughter, Elodie, and their little dog, Skipper.
This post may contain affiliate links. As an Amazon Associate, I may earn a small commission if you buy something through one of them at no extra cost to you. I only share products I use myself and genuinely recommend.





I’ve made these cinnamon buns several times and they always turn out great ! I believe they’re the best cinnamon bun I’ve ever eaten. Try them fresh from the oven, they’re to die for. They’re easy to make, I’ve given some to friends and they’ve made them and love them too.
You say they can be made a day ahead but when you have let them rise for the final time where do you put them, in the fridge, on the counter before baking them for the next day?
Hi Karen, sorry about that! I will add that to the post. To let them rise for the final time you can either leave them on the counter (if your house is warm) or place them in the cold oven with the lightbulb turned on.
Kelli,
Thanks for the great recipe. If I make the day before and want to cook the next day, do I refrigerate before or after the 2nd rise?
Thanks so much,
Jenn
Winnsboro, Texas
hi Jenn, thanks for the great question! Here is what I would do:
1. Follow the recipe through the step of cutting the dough into individual rolls and placing them in the prepared baking dish.
2. Instead of letting them rise for the second time at room temperature, cover the dish with plastic wrap, ensuring it’s tight enough to prevent air from getting in but has enough give to allow the rolls to expand slightly as they might still rise a bit in the fridge.
3. Refrigerate the rolls overnight.
4. The next day, take the rolls out of the refrigerator and let them come to room temperature and complete their second rise. This can take anywhere from 1 to 2 hours depending on the temperature of your kitchen. They should roughly double in size during this time.
5. Once the rolls have risen, proceed with baking them as the recipe directs.
I hope this helps!
Kelly.
If I don’t have a stand mixer should I still knead the dough by hand for 5-6 minutes?
Hi Abbey, absolutely! Kneading the dough by hand for 5-6 minutes is perfectly fine for this recipe, even if you don’t have a stand mixer. In fact, it’s a great way to get a feel for the dough’s texture. Since kneading by hand can be a bit more work than using a mixer, you might find it takes slightly longer than 5-6 minutes to achieve the desired dough texture. Trust your senses and stop kneading when the dough feels smooth and elastic.
Delicious! These were a joy to bake and when I worked the dough while kneading I knew this was a keeper. Love the small batch too and the texture of the bun is perfection.
We enjoy cream cheese frosting on cinnamon buns so I made a light vanilla and rum frosting.
Thank you so much for another fantastic recipe!